
This post may contain affiliate links, If you choose to buy through these links, I may receive a small commission at no additional cost to you.
Growing glorious garlic at home is one of those quiet gardening pleasures that often surprises people.
When fall arrives and mornings turn cold, many gardeners slow down.
Tools get cleaned, beds are ignored, and the season feels finished.
However, garlic doesn’t follow that rule.
Instead, it welcomes the cold. It grows slowly underground, asking only for patience and trust.
Garlic is planted once, protected through winter, and left mostly alone.
Months later, when you finally pull it from the soil, the reward feels solid and real : strong flavor, rich aroma, and the simple joy of growing your own food.
So if you cook even occasionally, growing glorious garlic at home just makes sense.
If you enjoy creating peaceful spaces at home, you may also like this guide on designing the perfect study nook at home for comfort and focus.
1. Why Growing Glorious Garlic Is Worth It
Garlic is easygoing. It doesn’t demand daily care, yet it gives back generously.
Growing glorious garlic at home helps you:
-
Add deep flavor to everyday meals
-
Store garlic for many months
-
Enjoy a low-maintenance crop
-
Grow food that handles cold weather easily
-
Improve soil health over time
In fact, once garlic becomes part of your garden, it often stays there year after year.
2. Understanding the Growing Glorious Garlic Cycle
Garlic follows a long, steady growth pattern.
-
Planted in fall
-
Roots develop before winter
-
Growth slows during cold months
-
Green shoots appear in spring
-
Harvest happens in early to mid-summer
As a result, this slow pace helps garlic form full, healthy bulbs. Cold temperatures also play an important role in proper bulb development.
3. Choosing the Right Garlic for Growing Glorious Garlic
3.1 Avoid grocery store garlic
Garlic sold in supermarkets is usually treated to prevent sprouting. As a result, it may grow poorly or not grow at all.
Better options for growing glorious garlic include:
-
Local garden nurseries
-
Trusted seed garlic suppliers
-
Garlic from an experienced gardener
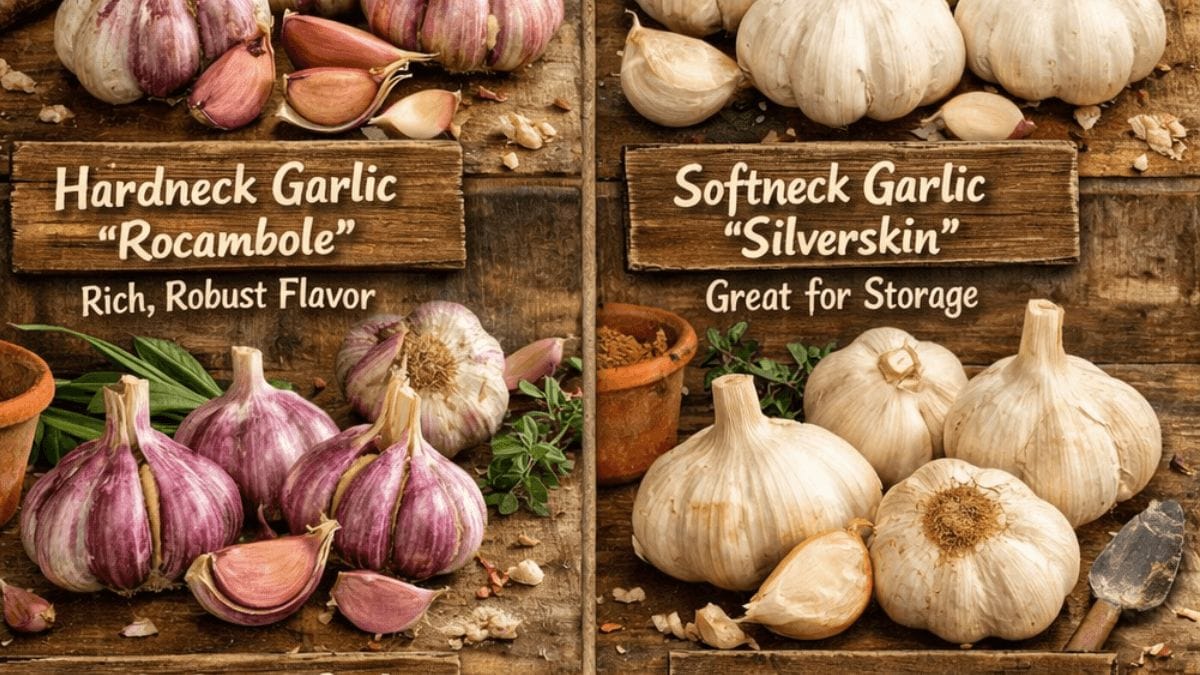
3.2 Hard-neck vs soft-neck garlic
Hard-neck garlic
-
Best suited for colder regions
-
Produces curly flower stems called scapes
-
Offers strong, bold flavor
Soft-neck garlic
-
Grows well in mild climates
-
Stores longer after harvest
-
Can be braided for storage
Overall, choose varieties that suit your climate. In most cases, locally grown garlic performs best.
Growing garlic becomes much easier when you use a deep fabric grow bag, especially if you’re gardening in a small space or balcony.
4. Preparing the Soil for Growing Glorious Garlic
Garlic prefers loose, healthy soil. It does not like compacted ground or standing water.
Good soil basics include:
-
Well-draining structure
-
Rich organic matter
-
Minimal weeds
Before planting:
-
Loosen the soil 6–8 inches deep
-
Mix in compost if available
-
Gently level the surface
In addition, raised beds work beautifully. Garlic also grows well directly in the ground when soil is light and healthy.
5. When and How to Plant Growing Glorious Garlic
5.1 Best time to plant garlic
Mid-fall to late fall is ideal. The soil should not be frozen solid, and cool days work best.
Even so, if winter is approaching and the soil is still workable, plant anyway. Garlic is forgiving.
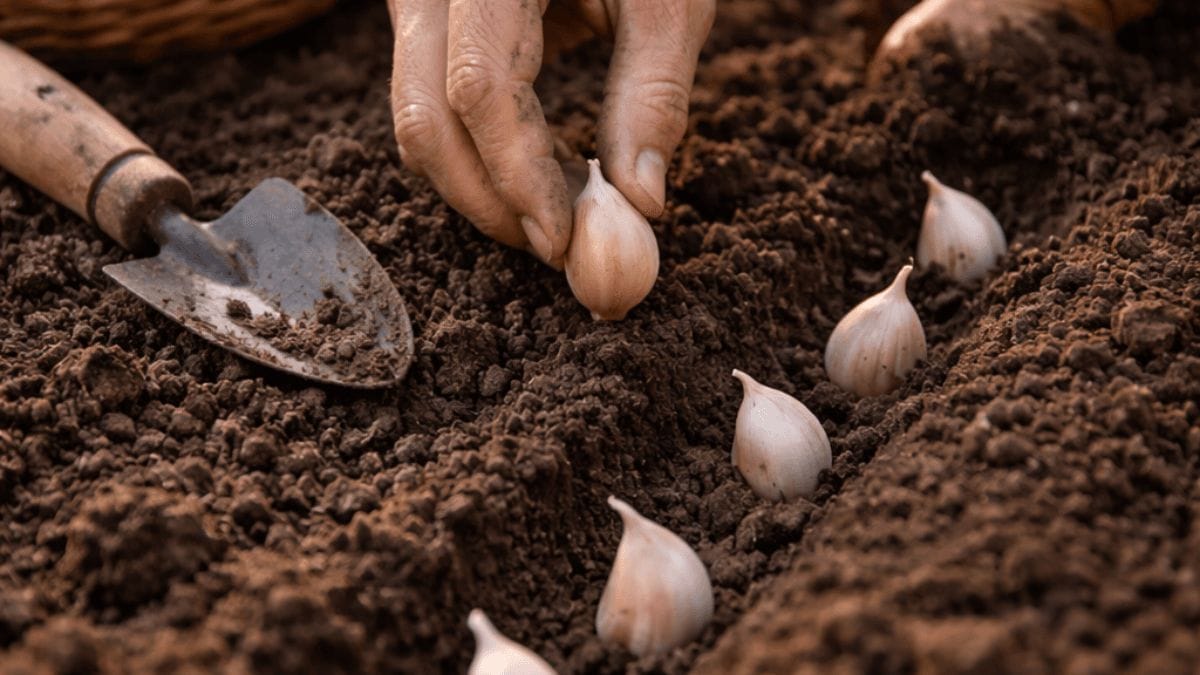
5.2 Planting steps
Break garlic heads into individual cloves. Keep the papery skin intact, and select large, healthy cloves.
Planting details:
-
Depth: 1–2 inches
-
Spacing: 4–6 inches apart
-
Rows: 8–12 inches apart
Always plant cloves with the flat side down and the pointed tip facing up. Then cover gently with soil.
6. Mulching for Winter Protection
Mulching is an important step when growing glorious garlic.
Good mulch options include:
-
Dry leaves
-
Straw
-
Dried grass clippings
Apply 4 – 6 inches of mulch over the planted bed.
This helps keep soil temperature stable, prevents weeds, retains moisture, and protects cloves from freezing and thawing.
7. Watering Growing Glorious Garlic
Garlic does not like wet soil.
After planting:
-
Keep soil slightly moist until the ground freezes
In spring:
-
Water only if rainfall is low
-
Avoid soaking the bed
Therefore, avoid soaking the bed. Too much water can cause rot, and garlic prefers balance, not excess.
8. Spring Growth of Growing Glorious Garlic
As temperatures warm, green shoots begin to push through the soil.
At this stage:
-
Pull back thick mulch if needed
-
Allow sunlight to reach the plants
-
Enjoy steady, healthy growth
Over time, garlic grows slowly but confidently.
9. Feeding Growing Glorious Garlic
Garlic does not need heavy feeding.
The best option is compost applied once or twice a year. In most gardens, healthy soil already provides what garlic needs.
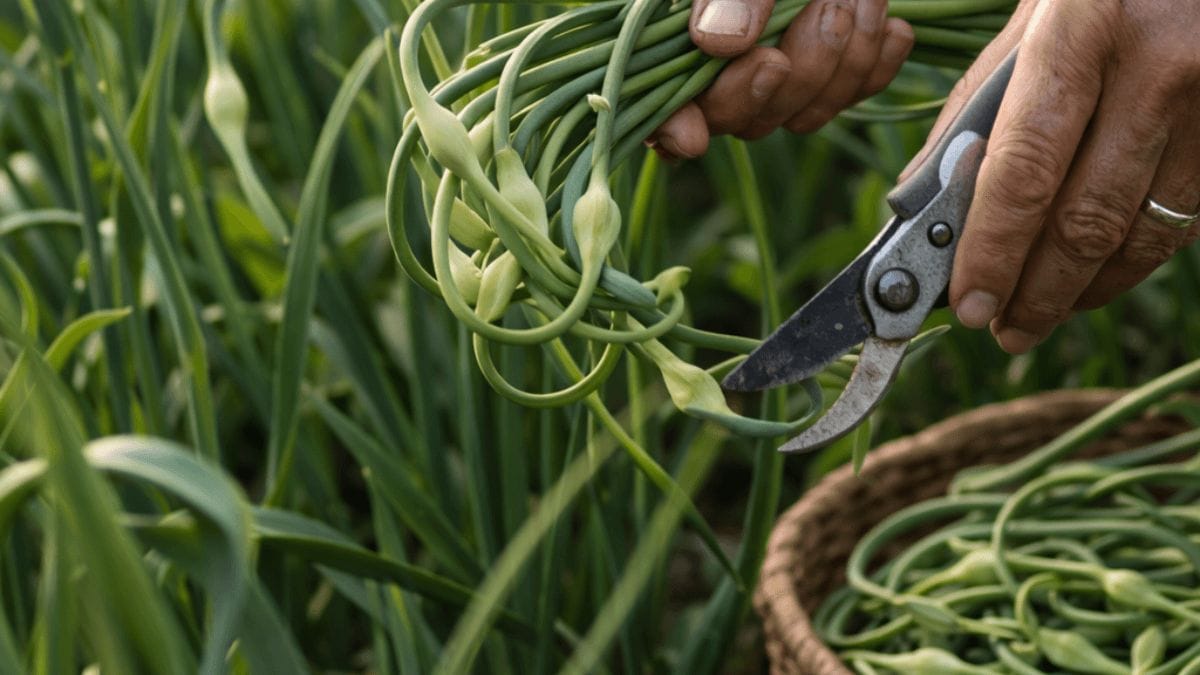
10. Garlic Scapes : A Bonus from Growing Glorious Garlic
Hard-neck garlic produces curly stems known as scapes.
When scapes appear:
-
Cut them off early
-
Leave the bulb in the ground
This helps bulbs grow larger and prevents energy loss.
Garlic scapes can be used in many ways:
-
Chopped into eggs
-
Added to stir-fries
-
Blended into pesto
-
Frozen for later use
11. Knowing When Growing Glorious Garlic Is Ready to Harvest
Garlic shows clear signs when it is ready.
-
Bottom leaves turn brown
-
Top leaves remain green For example, bottom leaves turning brown while top leaves stay green is a clear sign that garlic is ready to harvest.
Harvest usually happens in early to mid-summer, depending on climate. Most importantly, do not wait until all leaves turn brown.
12. Curing Growing Glorious Garlic for Storage
Curing prepares garlic for long-term storage.
Curing steps:
-
Leave stems and leaves attached
-
Place garlic in a dry, shaded area
-
Ensure good air circulation
Ideal conditions include:
-
Temperature between 70–80°F (21–27°C)
-
Dry air
-
A fan for even drying
Usually, curing takes 2–3 weeks.
If you’re planting garlic in containers, a 15-gallon fabric grow bag provides enough depth for strong roots and healthy bulbs.

13. Cleaning and Storing Garlic
Once cured, garlic skins feel dry and papery, and stems become stiff.
Trim roots and stems carefully.
Storage tips:
-
Keep garlic in a cool, dark place
-
Use mesh baskets or paper bags
-
Avoid plastic containers
With proper curing, garlic can store for several months.
14. Saving Garlic for Next Season
Growing glorious garlic often becomes a yearly habit.
Each season:
-
Save the biggest and healthiest bulbs
-
Replant those cloves in fall
Over time, garlic adapts to your soil and climate, often improving with each season.
15. A Final Word from the Garden
Growing glorious garlic teaches patience. You plant when the garden feels quiet. You trust it through winter. Then one day, you pull up something solid and real.
Homegrown garlic smells stronger, tastes sharper, and feels truly earned.
So plant it once, and you’ll likely keep planting it every fall.
For expert and research-based guidance, you can also refer to this garlic growing guide from a trusted horticulture authority.