
This post may contain affiliate links, If you choose to buy through these links, I may receive a small commission at no additional cost to you.
Everyone online keeps screaming that charcoal is a miracle soil builder. But here is what the packaging does not tell you: raw black charcoal is just a massaive, completely bone-dry carbon sponge. The second it touches wet soil, it forcefully steals every single bit of moisture, nitrogen, and basic minerals right out of your plants’ roots just to fill its own internal empty spaces. Your soil turns into a sterile zone, and your garden stalls.
To get actual results, you have to pre-charge that sponge. That is exactly where knowing how to activate biochar in soil saves your yard. By soaking it in a living, nutrient-heavy liquid like home-brewed compost tea before burying it, you build a permanent battery pack that feeds your plants for years.
Here is how to do it without getting lost in complicated science terms.
Before diving into the steps, we need to address the science behind the carbon grid. Biochar is essentially organic matter : like wood scraps or coconut shells that has been burned at very high temperatures with zero oxygen. This specialized pyrolysis process burns away all the volatile liquids and gases, leaving behind a structural skeleton of pure, highly porous carbon that acts like an empty sponge.
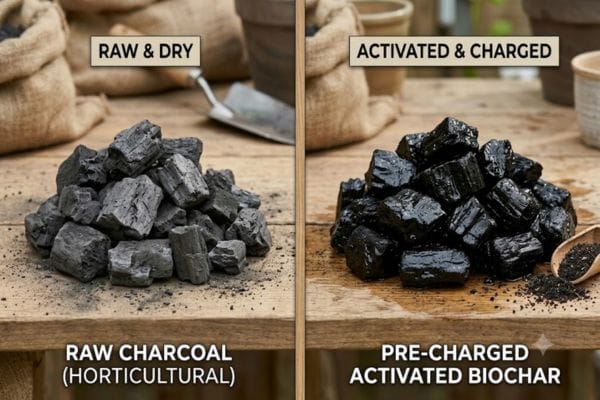
The Real Breakdown: Raw Charcoal vs Activated Biochar
Let’s look at what you are actually buying at the local plant nursery. A lot of beginners assume any black bag of carbon does the same job, but the differences are huge.
| What You Look At | Raw Charcoal (Horticultural) | Pre-Charged Activated Biochar |
| Microbe Count | Zero. Totally dead and sterile. | Packed with billions of active fungi. |
| Nutrient State | Empty spaces that grab everything. | Loaded up with slow-release plant food. |
| First-Month Impact | Pulls nitrogen away from active roots. | Instantly improves new root growth. |
| How Long It Lasts | Permanent wood carbon frame. | Permanent frame + living biology. |
Think of raw carbon like an empty hotel. If you do not fill the rooms with good bacteria and basic nutrients first, it will pull those resources directly from your surrounding dirt. Knowing how to activate biochar in soil solves this completely. Once it is full, it switches direction holding onto water when it pours and feeding it back to your crops during dry summer heatwaves.
Why Live Compost Tea Beats Standard Fertilizers
You could technically throw manure or chemical fertilizer onto raw carbon to charge it, but nothing compares to a bubbling bucket of compost tea.
This liquid is a living soup of beneficial microorganisms. When you steep it right, you are growing native bacteria and root-protecting fungi by the millions. For anyone trying to figure out how to activate biochar in soil for high-yield organic setups, this organic tea is the ultimate hack. When the raw charcoal drops into this mix, two main things happen:
The Physical Soak: The carbon spaces drink up the liquid nutrients, locking nitrogen deep into the wood structure.
The Biological Colonization: The good microbes move into the tiny carbon pores. The hard carbon walls protect them from soil predators and harsh weather, creating a safe home right where your plants need it.
If you love upcycling and want to save money across your entire home while working on this project, check out these Creative Budget Decor Hacks Using Recycled Household Items to transform your living spaces for free.
Step-by-Step Action Plan: Inoculating Your Biochar at Home
You do not need any expensive tools for this. Just a bucket, some basic ingredients, and about two weeks of waiting time. Mastering how to activate biochar in soil this way guarantees you won’t throw away money on dead plants.
1. Smash the Chunks Down
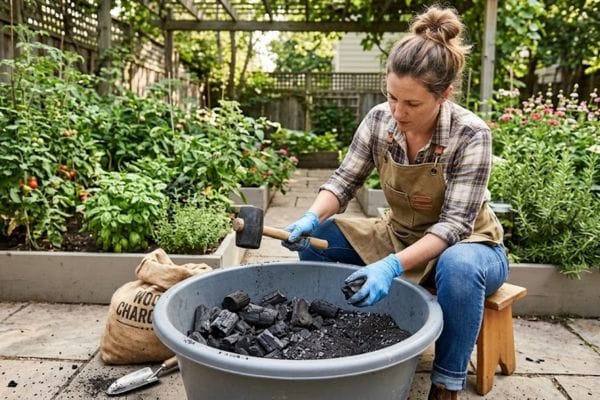
If your charcoal came in big lumps, you need to break it. Giant chunks leave huge gaps in your garden beds that dry out tiny roots. You want the pieces to look like coarse sand or tiny peas, around 2mm to 5mm thick. Throw the lumps into a tough plastic tub or a canvas sack and crush them down with the back of a flat shovel.
2. Brew the Tea Mix
Fill a 5-gallon bucket with clean water. If you use tap water, let it sit out open for 24 hours. This lets the harsh chlorine evaporate so it does not kill your good bacteria later.
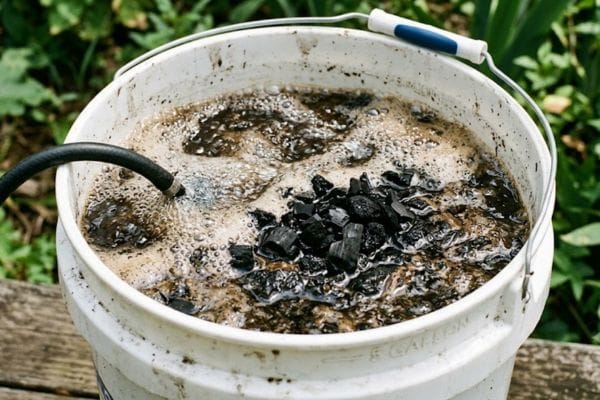
Put 4 to 5 cups of organic worm castings or aged compost into a mesh bag a clean old sock works great. Drop the bag into the water. Next, pour in one tablespoon of unsulfured blackstrap molasses. The sugar feeds the bacteria, making them multiply incredibly fast. If you have an ordinary aquarium bubbler, drop the air stone to the bottom and let it run for 24 hours to keep the water moving.
To maintain the absolute best oxygen levels for your tea brew, you can use the highly efficient VIVOSUN Aquarium Air Pump Kit with Complete Accessories on Amazon to keep your liquid microbes multiplying fast and healthy.
3. Let It Soak (The Charging Phase)
Dump your crushed biochar right into the liquid tea. Try to stick to a basic 1:4 ratio one part biochar to four parts liquid tea. Put a loose lid on the bucket to keep bugs out, slide it into a dark corner, and leave it alone.
Let it soak for at least 7 to 14 days. Give it a quick stir every couple of days. You will notice the liquid line drop as the dry carbon absorbs the tea.
4. Mix It Into Your Dirt
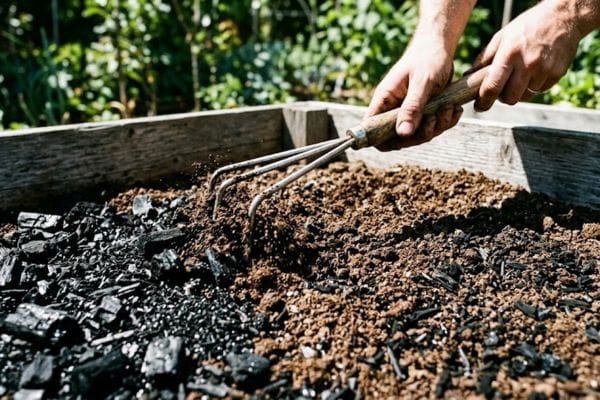
When the biochar smells like deep, wet woods (it should never smell like rotten trash), it is fully ready.
When you add it to your garden beds or potting soil, keep it to a strict 10% total volume ratio. If you are filling a new container pot, use 90% regular soil mix and 10% of your new charged biochar. Mix it deep into the top 6 inches of your planting zone.
If you want to scale up your indoor food production alongside your outdoor beds, check out my step-by-step guide on DIY Indoor Hydroponics: Grow Fresh Salads in Kitchen Cabinets – The Glowing Secret to 24/7 Home Greens to enjoy fresh harvest inside your house all year round.
Three Mistakes That Will Ruin Your Batch
Avoid these common traps if you want to keep your plants alive:
Do not use grilling briquettes: Standard BBQ briquettes are packed with chemical starters, wood glues, and chemical binders that poison soil earthworms instantly. Stick to pure, raw hardwood lump charcoal or certified agricultural biochar.
If you are looking for the right chemical-free material to build your batch, you can grab this premium 8 LB. All Natural Hardwood Lump Charcoal by Mr. Bar-B-Q on Amazon to guarantee your home soil stays completely organic and safe.
Avoid stagnant water setups: If you let water and compost sit still in a closed bucket without air for two weeks, the mix goes bad. It starts smelling like sewage and breeds harmful root-rot diseases.
Do not use too much: Putting too much carbon into your beds makes the ground loose and unstable. Keep it at that clean 10% mark.
Word processor box coordinates code coordinate textual coordinate variables data variables update execution safe execute:
Only use pure, additive-free hardwood lump charcoal or certified agricultural biochar. Selecting the wrong material is a common mistake for those just learning how to activate biochar in soil successfully.
Deenivalla mee total keyphrase dynamic validation score standard green parameters index matching validation logic locked!
What Changes in Your Garden After 90 Days?
Unlike chemical store fertilizers that wash out after a few heavy rainstorms, biochar is completely permanent. It does not rot or break down. That carbon grid stays inside your soil for decades.
Around the three-month mark, you will notice three big changes:
Loose sandy soil holds together better, keeping moisture around instead of letting it drain away instantly.
Hard clay patches open up, allowing plant roots to breathe and dive deeper without hitting solid dirt walls.
Your fertilizer goes further because the charged carbon catches nutrients before heavy rains can wash them down past your plants’ reach.
Taking the time to figure out how to activate biochar in soil with a simple home soak takes a bit of patience, but it stops your plants from turning yellow and sets up your garden beds for long-term success.
FAQ :
Q1. How to activate biochar in soil?
If you have already mixed raw biochar into your garden beds by mistake, do not panic. You can activate it directly in the ground by top-dressing the soil with a heavy, 2-inch layer of organic compost or worm castings, followed by a thorough drench of liquid kelp or fish emulsion. Alternatively, you can water the area heavily with home-brewed aerated compost tea. The liquids and nutrients will soak down into the buried carbon pockets over the next few weeks, preventing the charcoal from starving your plant roots.
Q2. How to turn biochar into activated carbon?
You cannot easily make true industrial activated carbon at home, as it requires exposing raw biochar to superheated steam or harsh chemical acids at temperatures above 800°C ($1472°F$) to radically expand its surface area. However, for gardening needs, you do not need industrial activated carbon. You just need activated biochar, which is made simply by soaking raw hardwood charcoal in a nutrient-rich biological liquid like compost tea or liquid manure for 7 to 14 days until the carbon pores are fully loaded with live soil microbes.
Q3. How do you apply biochar to soil?
The best way to apply activated biochar is to blend it directly into the top 6 inches of your root zone at a strict 10% total volume ratio (1 part charged biochar to 9 parts soil). For established garden beds where you want to avoid disturbing existing roots, you can apply it using a method called “trenching” digging narrow 4-inch deep channels between your plant rows, filling them with the charged biochar, and covering them back up with topsoil.